














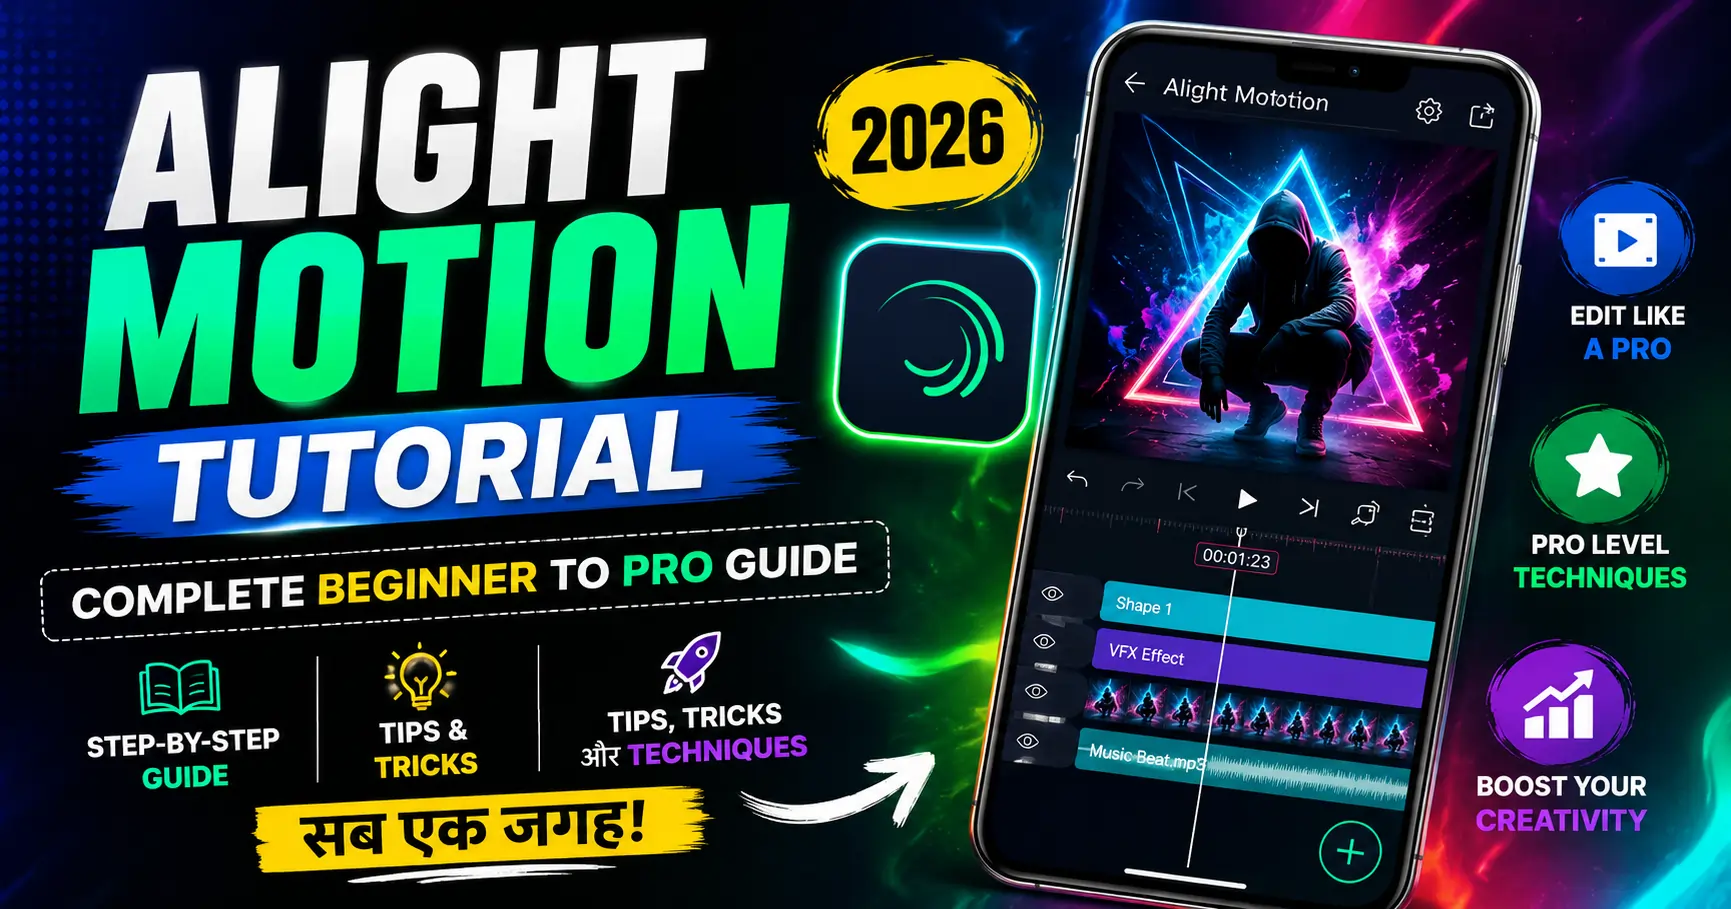
Alight Motion Tutorial: Complete Beginner to Pro Guide (2026) — Tips, Tricks और Techniques सब एक जगह

Instagram Reels या YouTube Shorts देखते हो और सोचते हो — “यार, यह smooth animation और transitions कैसे बनाते हैं?”
मैंने भी यही सोचा था। और जब research किया तो पता चला — ज़्यादातर top content creators एक ही app use करते हैं। वो app है — Alight Motion। यह वो app है जो mobile पर professional-level video editing, keyframe animation, motion graphics और visual effects देता है — वो भी बिल्कुल free में।
लेकिन problem यह है — Alight Motion पहली बार open करो तो overwhelming लगता है। Timeline, layers, keyframes, effects — सब एक साथ दिखता है और समझ नहीं आता कहां से शुरू करें।
इसीलिए मैंने यह complete guide लिखी है — और साथ में एक free complete video course भी बनाया है जो तुम्हें beginner से pro बनाएगा। तो इंतजार किस बात का कर रहे हो भाई तो अभी देखिए इस complete Guide को अगर आप इस गाइड को पढ़ना नहीं चाहते हैं तो आप हमारे चैनल Perfect Editor पर जाकर के हमारा कंपलीट कोर्स देखकर के भी आप alight motion tutorial सीख सकते हो बहुत ही आसानी से
🎬 पहले Free Course देखो — फिर Guide पढ़ो
मैंने आपके लिए एक complete Alight Motion video course बनाया है जिसमें सब कुछ step-by-step दिखाया गया है। आप जो है इस कंपलीट गाइड को देखकर के भी सीख सकते हो कि कैसे लाइट मोतियों को उसे करना है कंप्लीट जानकारी दी है एकदम सिंपल लैंग्वेज में जिस प्रकार से हमने यह आर्टिकल लिखा है एकदम simple रखा है उसी तरीके से हमारा जो कोर्स है वह भी एकदम सिंपल रखा हुआ है जो आपको देखते ही समझ में आ जाएगा
👉 Free Complete Alight Motion Course देखें — YouTube पर
इस course में cover है:
- App setup और basic interface
- Layers और timeline का use
- Keyframe animation
- Effects और transitions
- Export settings
- और बहुत कुछ
इस article को course के साथ साथ पढ़ो — written explanation + video = fastest learning।
Alight Motion क्या है? (Quick Overview)
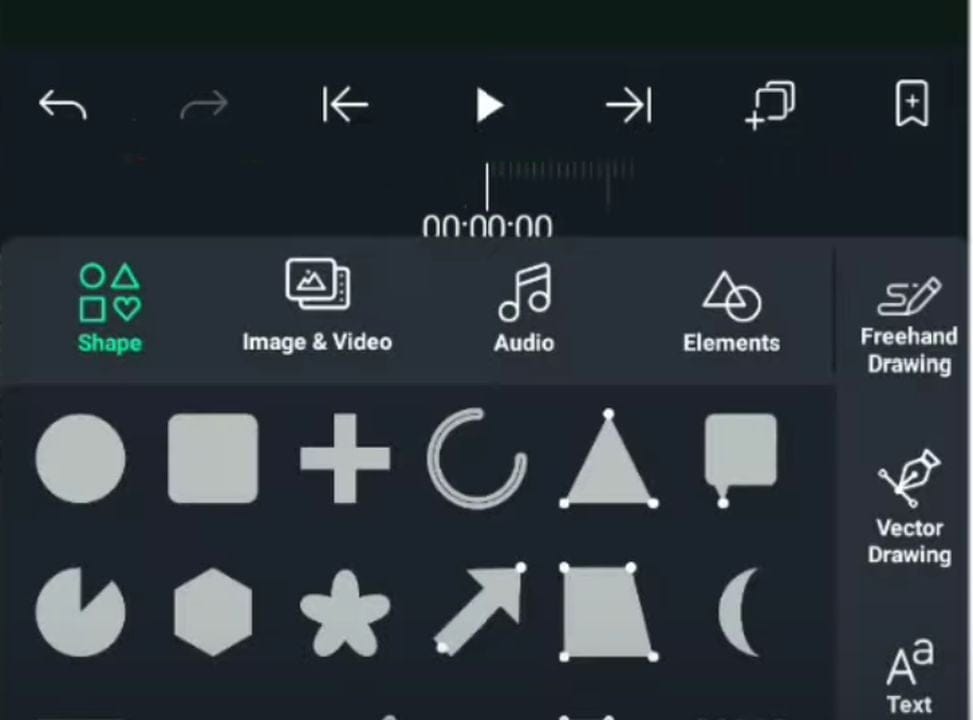
Alight Motion एक professional mobile video editing और animation app है जो Android और iOS दोनों पर available है। और यह एक पावरफुल वीडियो एडिटिंग ऐप है जो मतलब के पीसी लेवल तक की वीडियो भी एडिट कर सकते हैं इसमें 3D वीडियो भी एडिटिंग की जा सकती है हर चीज मैंने सिखाया है आप देखिए
Alight Motion क्यों use करें:
| Feature | Alight Motion | Normal Video Apps |
|---|---|---|
| Keyframe Animation | ✅ हां | ❌ नहीं |
| Multi-layer Editing | ✅ हां | ❌ Limited |
| Motion Graphics | ✅ हां | ❌ नहीं |
| Visual Effects | ✅ 200+ | ❌ कुछ basic |
| XML Presets | ✅ हां | ❌ नहीं |
| Vector Design | ✅ हां | ❌ नहीं |
| 4K Export | ✅ हां | ⚠️ Limited |
किसके लिए best है:
- Instagram Reels और YouTube Shorts creators
- Motion graphics और animation सीखने वाले
- Professional-looking edits बनाने वाले
- Intro और outro बनाने वाले
- Lyrical और status video editors
Download करें:
- Android: Google Play Store
- iOS: Apple App Store
Alight Motion Interface समझो — Step by Step
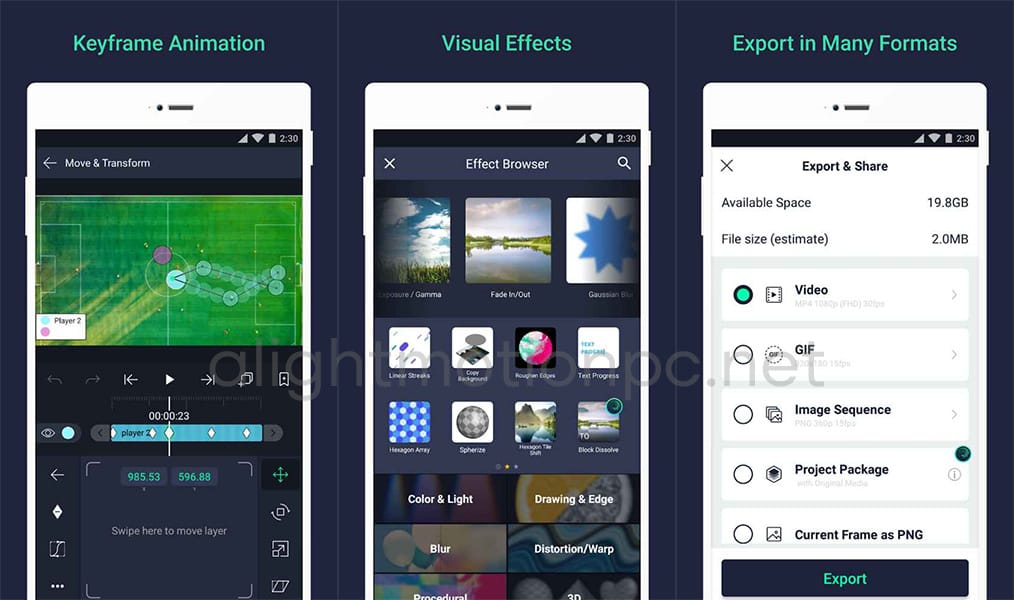
App open करने पर 4 main sections दिखते हैं:
1. Projects Screen: यहां तुम्हारे सभी projects save होते हैं। नया project बनाने के लिए “+” button press करो।
2. New Project Settings:
- Resolution: 1080×1920 (Reels/Shorts), 1920×1080 (YouTube), 1080×1080 (Instagram post)
- Frame Rate: 30fps (standard), 60fps (smooth motion)
- Duration: कितने seconds का video बनाना है
3. Main Editor Screen:
┌─────────────────────────────┐
│         Preview Area        │  ← Video preview यहां दिखता है
├─────────────────────────────┤
│      Toolbar (Top)          │  ← Undo, redo, settings
├─────────────────────────────┤
│      Layer Panel            │  ← सभी layers यहां
├─────────────────────────────┤
│      Timeline               │  ← Animation timeline
├─────────────────────────────┤
│    Properties Panel         │  ← Selected layer की settings
└─────────────────────────────┘
4. Export Screen: Final video को MP4 format में save करने की settings।
Alight Motion की 5 Core Features
Feature 1: Layers System
Layers Alight Motion की backbone है। हर element — video, image, text, shape — एक अलग layer पर होता है।
Layers क्यों important हैं:
- Multiple elements को अलग-अलग edit कर सकते हो
- एक layer को दूसरे के ऊपर या नीचे रख सकते हो
- हर layer पर अलग effects और animation लगा सकते हो
Layer Types:
- Video Layer: अपना footage add करो
- Image Layer: Photos और PNG files
- Text Layer: Animated text
- Shape Layer: Lines, rectangles, circles — vector shapes
- Audio Layer: Background music और sound effects
Layer Tips:
- Layers को rename करो — confuse नहीं होगा
- Lock 🔒 icon से layer accidentally edit होने से बचाओ
- Eye 👁️ icon से layer hide/show करो
- Group related layers को folder में रखो
Feature 2: Keyframe Animation — Alight Motion की Superpower
Keyframe क्या है: Keyframe एक marker है जो timeline पर किसी specific moment पर किसी property की value store करता है।
Simple example:
- 0 second पर text screen के बाहर है (keyframe 1)
- 1 second पर text center में है (keyframe 2)
- Alight Motion automatically smooth animation बनाता है बीच में
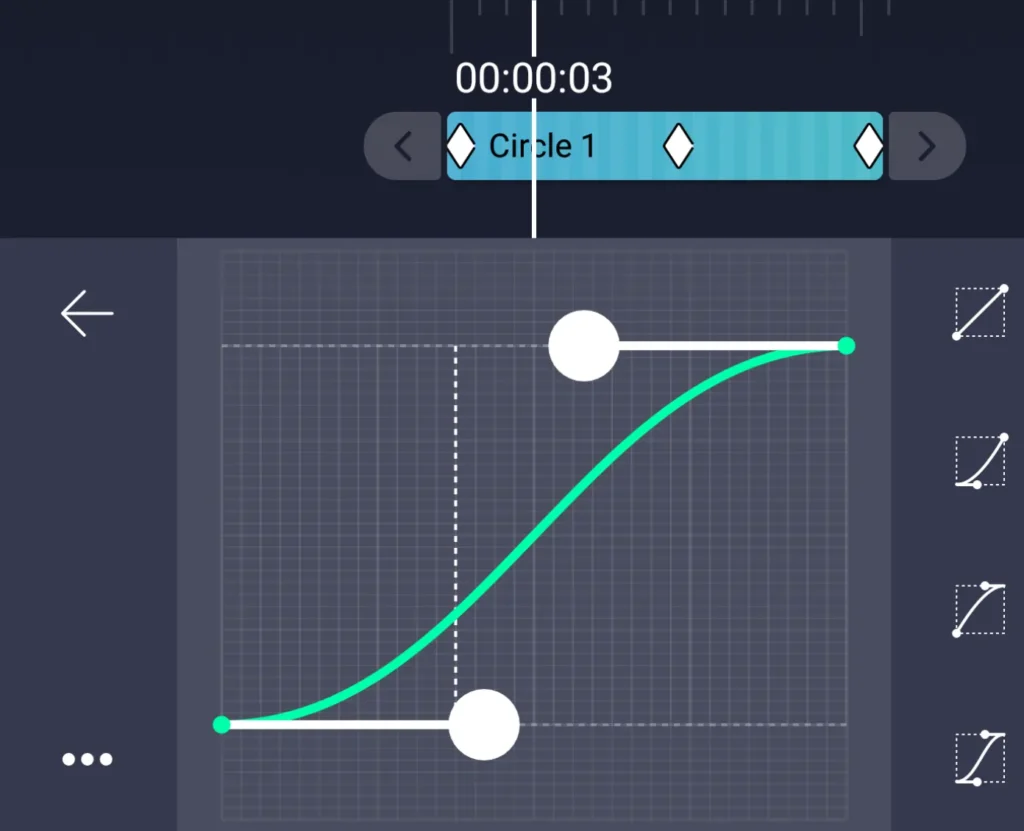
Keyframe कैसे add करें:
Step 1: Layer select करो जिसे animate करना है
Step 2: Timeline पर playhead उस point पर ले जाओ जहां animation शुरू होगी
Step 3: Property select करो (Position, Scale, Rotation, Opacity)
Step 4: Diamond (◆) icon tap करो — keyframe add हो गया
Step 5: Playhead को आगे ले जाओ → property की value change करो → automatically दूसरा keyframe बन जाता है
Keyframe Types:
| Type | Effect |
|---|---|
| Linear | Constant speed — mechanical लगता है |
| Ease In | Slowly start, then speed up |
| Ease Out | Fast start, then slow down |
| Ease In-Out | Slow → Fast → Slow — natural और smooth |
| Bounce | Spring effect — playful feel |
| Overshoot | थोड़ा ज़्यादा जाकर वापस आता है |
Pro Tip: ज़्यादातर animations के लिए Ease In-Out use करो — सबसे natural लगता है।
Feature 3: Effects और Filters
Alight Motion में 200+ visual effects हैं। इन्हें categories में समझो:
Blur Effects:
- Motion Blur: Movement को cinematic बनाता है
- Directional Blur: एक direction में blur — speed feel
- Gaussian Blur: Background blur के लिए
Color Effects:
- Color Correction: Brightness, contrast, saturation adjust करो
- Hue/Saturation: Colors change करो
- LUT (Look Up Table): Professional color grades — cinematic look
Distortion Effects:
- Wave: Wavy distortion
- Twirl: Spin distortion
- Fisheye: Wide angle effect
Stylize Effects:
- Glow: Neon और glow effects
- Echo: Ghost trail effect
- Pixelate: Pixelated look
Chroma Key (Green Screen): Green या किसी भी solid color को transparent बनाओ — background replace करो।
Effect कैसे Add करें:
- Layer select करो
- Bottom में “+” → “Effect” tap करो
- Category choose करो
- Effect select करो
- Properties adjust करो
Multiple Effects Stack करो: एक layer पर multiple effects add हो सकते हैं। Order matter करता है — नीचे वाला effect पहले apply होता है।
Feature 4: Text Animation
Text animation Alight Motion में बहुत powerful है — Instagram captions, titles, और lyrical videos के लिए perfect है है और टेक्स्ट एनीमेशन एलाइट मोशन में बहुत सारे दिए हुए हैं और आप अपना custom text animation भी बना सकते हो alight motion के अंदर यह भी एक बहुत ही अच्छा और तगड़ा पिक्चर है इस एलाइट मोशन का
Text Add करें: “+” → “Text” → अपना text type करो
Text Properties:
- Font family (hundreds of fonts available)
- Size, color, opacity
- Letter spacing और line height
- Stroke (outline) और shadow
Animated Text बनाओ:
Slide-In Text:
- Text layer select करो
- Starting position: screen के बाहर (left side)
- Keyframe add करो
- 0.5 second आगे जाओ
- Position: center में
- Ease In-Out apply करो
Fade-In Text:
- Opacity को 0% पर keyframe लगाओ
- 0.5 second बाद Opacity 100%
- Done!
Typewriter Effect: Opacity 0 से 100 को text के हर letter पर individually apply करो — typing का effect आता है।
Hindi Fonts के लिए: Custom Hindi fonts import कर सकते हो। Google Fonts से Hindi fonts download करो → Alight Motion में import करो।
Feature 5: Export Settings
सारी मेहनत के बाद final video सही settings से export करना ज़रूरी है।
Export Settings:
Resolution:
- 1080p (1920×1080 or 1080×1920) — standard
- 4K (3840×2160) — best quality, large file size
Frame Rate:
- 30fps — standard
- 60fps — smooth motion, games/sports के लिए
Format:
- MP4 — universally compatible, recommended
- GIF — animated Gifs के लिए
Quality:
- High — best quality, bigger file
- Medium — balance
- Low — small file, lower quality
Pro Tip: Instagram और YouTube Shorts के लिए 1080p, 30fps, High Quality — perfect balance।
5 Beginner Mistakes जो Avoid करो
तो मैं यहां पर अपने अनुभव से कुछ बिगनर मिस्टेक्स बता रहा हूं जो आपको नहीं करनी है अगर आप कहोगे तो आपका वीडियो भी इतना अच्छा नहीं बनेगा और वायरल भी आप नहीं हो पाओगे तो इन चीजों का आपको ध्यान रखना है और आपको भी ऐसी गलतियां नहीं करनी है
❌ Mistake 1: Too Many Effects एक साथ हर layer पर 5-6 effects लगाने से video messy लगती है। Less is more।
❌ Mistake 2: Keyframes बिना Easing के Linear keyframes robotic लगते हैं। हमेशा Ease In-Out use करो।
❌ Mistake 3: Wrong Resolution Reels के लिए 1080×1920 (vertical), YouTube के लिए 1920×1080 (horizontal) — गलत resolution = cropping या black bars।
❌ Mistake 4: Layers का Mess बिना rename किए 20 layers बना दो — फिर कुछ नहीं मिलेगा। Layers को meaningful names दो।
❌ Mistake 5: Save नहीं करना Alight Motion auto-save करता है, लेकिन manually भी save करो। बड़े projects lose होना बहुत frustrating है।
3 Trending Effects जो 2026 में Viral हैं
तो मैं यहां पर कुछ ट्रेडिंग इफेक्ट्स कर किए हैं जो 2026 में वायरल हो रहे हैं और इन्हें भी आप अपने वीडियो बना करके सीख सकते हो कैसे उसे करना है और भी आप सर्च करना चाहते हो तो इंस्टाग्राम प्रिंस में भी आपको मिल जाएंगे एलाइट मोशन ट्रेडिंग इफेक्ट्स जो रिले वायरल हो रही है उनका ट्यूटोरियल भी मिल जाता है यूट्यूब पर सर्च करते हो तो
Effect 1: Smooth Zoom Transition
यह transition Reels में बहुत popular है।
कैसे बनाएं:
- दो video clips timeline पर रखो
- Transition point पर दोनों clips पर Scale property में keyframes लगाओ
- Clip 1: Scale 100% → 120% (zoom in)
- Clip 2: Scale 120% → 100% (zoom out)
- Ease In-Out apply करो
- Motion Blur effect add करो
Result: Cinematic smooth zoom transition।
Effect 2: Glitch Effect
Glitch effect YouTube intros और gaming content में बहुत use होता है।
कैसे बनाएं:
- Video layer duplicate करो (3 copies)
- हर copy पर अलग color channel shift करो (RGB split)
- Random positions पर छोटे-छोटे keyframes
- Position को randomly ±5-10px shift करो
- Opacity flickering add करो
Shortcut: Glitch effect directly Effects menu में मिलता है — “Distortion” category में।
Effect 3: Neon Glow Text
Instagram aesthetic content के लिए perfect होता है आजकल एसथेटिक रूल्स का बहुत ज्यादा चलन हो गया है यह लोगों को बहुत ज्यादा पसंद आती है एसथेटिक रेल को और ज्यादा बनाना सीखना है तो आप ट्यूटोरियल सर्च करके भी सीख सकते हो और हमारे चैनल पर भी मिल जाएगा आपको इसका कंप्लीट वीडियो
कैसे बनाएं:
- Text layer बनाओ
- Text color: White या light color
- Glow effect add करो → Color: neon blue/pink/green
- Blur radius: 20-30
- Intensity: High
- Dark background पर test करो
Bonus: Glow intensity को keyframe से animate करो — pulsing neon effect बनेगा।
Alight Motion vs Other Apps — Comparison
तो मैं यहां पर कुछ एप्स का कंपैरिजन किया है और आप भी इनको देखिए और जानिए कि कैसे एलाइट मोशन बाकी एप्स से ज्यादा एडवांस है जैसे कैफ कार्ड किनेमास्टर इन शॉर्ट से कितना अच्छा है और कैसे इसका उसे किया जाता है यह एक कंपैरिजन टेबल बनाया है नीचे दिया गया है
| Feature | Alight Motion | CapCut | KineMaster | InShot |
|---|---|---|---|---|
| Keyframe Animation | ✅ Advanced | ✅ Basic | ✅ Medium | ❌ No |
| Motion Graphics | ✅ Best | ⚠️ Limited | ⚠️ Limited | ❌ No |
| Vector Design | ✅ Yes | ❌ No | ❌ No | ❌ No |
| XML Presets | ✅ Yes | ❌ No | ❌ No | ❌ No |
| Learning Curve | ⚠️ Steep | ✅ Easy | ⚠️ Medium | ✅ Easy |
| Free Version | ✅ Good | ✅ Excellent | ⚠️ Limited | ✅ Good |
| Best For | Animation/Pro edits | Quick edits | Multi-layer | Simple edits |
Bottom Line: Professional animation और motion graphics के लिए Alight Motion बेस्ट है। Quick social media edits के लिए CapCut।
Smart Strategy: Alight Motion में effects और animations बनाओ → Export करो → CapCut में captions और trending audio add करो। यह combination बहुत powerful है।
XML Presets — Time Saving Superpower
XML preset एक ready-made animation project file है जिसे तुम अपने content में use कर सकते हो। और सिंपल तरीके से समझो तो यह एक प्रोजेक्ट है जिसके अंदर आप अपने फोटो अपने मीडिया फाइल को ऐड करके उसे वीडियो को रेडी करके आप एक्सपोर्ट कर सकते हो एक रेडीमेड प्रोजेक्ट एनीमेशन है
XML Preset क्या होता है: किसी creator ने एक complex animation बनाई → उसे XML file के रूप में share किया → तुम download करके directly use करो।
Free XML Presets कहां से मिलते हैं:
- YouTube creators के video descriptions में
- Telegram channels (Alight Motion groups)
- Pinterest (search “Alight Motion XML”)
- BaseGrower जैसे blogs
XML Preset कैसे Use करें:
- XML file download करो
- Files app में XML file tap करो
- “Open with Alight Motion” select करो
- Project automatically open हो जाएगा
- अपना content replace करो
⚠️ Warning: Unknown sources से APK files मत download करो। सिर्फ XML files safe हैं। Modified APK = security risk।
Alight Motion से पैसे कैसे कमाएं?
हां, यह skill monetize भी हो सकती है तो मैं यहां पर कुछ तरीके बताएं है जिससे आप अपनी स्केल है वीडियो एडिटिंग की इसको मोनेटाइज कर सकते हैं तो यहां पर बहुत सारे तरीके हैं और वैसे में में तरीकों को मैं नहीं यहां पर एक्सप्लेन किया है 4 से 5 तरीका है और आप अपना खुद का कंटेंट बनाकर के भी मोनेटाइज कर सकते हो लेकिन उसमें थोड़ा टाइम लग सकता है
1. Freelance Video Editing: Businesses और YouTubers को intro, outro, और promotional videos बनाकर दो। Fiverr और Upwork पर Alight Motion editors की demand है। ₹500-₹5000 per video।
2. Template Selling: अपने custom XML presets और templates बेचो। Gumroad पर ₹199-₹999 में sell हो सकते हैं।
3. YouTube Channel: Alight Motion tutorials की YouTube पर बहुत demand है — खासकर Hindi में। Channel बनाओ, tutorials upload करो, AdSense और sponsorships से income।
4. Instagram Reels और Shorts: खुद का creative content बनाओ, followers बढ़ाओ, brand deals लो।
5. Social Media Management: Local businesses के लिए social media content create करो — monthly retainer पर।
Complete Learning Path — Beginner से Pro तक
Week 1: Basics
- App download और setup करो
- Interface समझो (layers, timeline, preview)
- पहला simple project बनाओ (text + background)
- Basic transitions सीखो
- Free Course देखो — Week 1 sections
Week 2: Keyframes और Animation
- Position keyframes practice करो
- Scale और rotation animate करो
- Easing types try करो
- Simple text animation बनाओ
- एक complete 15-second Reel बनाओ
Week 3: Effects और Advanced
- Color correction सीखो
- Motion blur add करो
- Glitch effect बनाओ
- Chroma key (green screen) try करो
- XML preset download और use करो
Week 4: Mastery
- Neon glow text बनाओ
- Zoom transition master करो
- एक complete intro बनाओ
- अपना first XML preset create और share करो
- Portfolio बनाओ (5 best edits)
Quick Tips जो हर Editor को पता होने चाहिए
⚡ Speed Tips:
- Undo: Back button double press
- Layers copy: Long press → Duplicate
- Zoom timeline: Two fingers pinch
- Preview full screen: Play button पर long press
🎨 Design Tips:
- 2-3 colors से ज़्यादा use मत करो एक video में
- Contrast important है — dark background पर light text
- Fonts: एक video में maximum 2 fonts
- Whitespace छोड़ो — crowded design weak लगता है
⚙️ Performance Tips:
- Background apps close रखो
- Low-end phone पर 1080p से शुरू करो, 4K बाद में
- Large video files को compress करके import करो
- RAM कम है तो layers कम रखो
📤 Export Tips:
- Export से पहले full preview ज़रूर देखो
- Export के दौरान phone use मत करो
- WiFi पर YouTube upload करो — data save होगा
Conclusion: Alight Motion Master करो, Content Game Change हो जाएगा
यार, Alight Motion पहली बार complex लगता है — यह सच है।
लेकिन जब एक बार keyframes समझ आ जाते हैं, effects use करना सीख जाते हो — तब यह app एक superpower बन जाता है।
Main points याद रखो:
- Layers = Organization
- Keyframes = Animation की आत्मा
- Effects = Visual Appeal
- Easing = Smoothness
- Practice = Mastery
अभी शुरू करो:
- App download करो — Android या iOS
- Free Course देखो: 👉 BaseGrower का Complete Alight Motion Course
- पहला project बनाओ — simple text animation
- रोज़ 30 मिनट practice करो
- 4 हफ्ते में pro बन जाओगे
याद रखो: हर viral Reel और Shorts के पीछे consistent practice है। तुम भी वो edits बना सकते हो — बस शुरू करो।
कोई सवाल है? Comment में पूछो — मैं personally reply दूंगा।
Read This Article
FAQ
1: Q: Alight Motion free है या paid?
A: Alight Motion का basic version बिल्कुल free है जिसमें keyframe animation, layers, और effects सब available हैं। Pro subscription (लगभग ₹700/month) में extra effects, no watermark, और 4K export milta hai. Beginners ke liye free version kaafi hai.
2: Q: Alight Motion सीखने में कितना time लगता है?
A: Agar tum roz 30 minutes practice karo, to basic editing 1 hafte mein, keyframe animation 2 hafte mein, aur professional-level edits 4 hafte mein seekh sakte ho. BaseGrower ka free YouTube course dekho — isse aur bhi fast seekhoge.
3: Q: Alight Motion कौन से phone पर चलता है?
A: Alight Motion Android (version 5.0+) aur iOS (iPhone/iPad) dono par available hai. Low-end phones par thoda slow ho sakta hai — iske liye 1080p resolution use karo aur ek time par layers kam rakho.
4: Q: XML Preset क्या होता है और कैसे use करें?
A: XML preset ek ready-made animation file hoti hai jo doosre creators share karte hain. Ise download karo, phone mein tap karo, “Open with Alight Motion” select karo — project automatically open ho jayega. Bas apna content replace karo aur video ready.
5: Q: Alight Motion और CapCut में कौन सा बेहतर है?
A: Dono alag purposes ke liye best hain. Professional animation, motion graphics aur keyframe editing ke liye Alight Motion best hai. Quick edits, auto-captions aur trending templates ke liye CapCut better hai. Smart creators dono use karte hain — Alight Motion mein effects banao, CapCut mein final touches do.


[…] Edit शुरू करने से पहले ये चीज़ें ready होनी चाहिए। or Complete Alight motion tutorial ke liye yha click kare […]
[…] Real Baat: पहली बार में values perfect नहीं लगेंगी — ये बिल्कुल normal है। Preview करो, aur agar shake zyada lag raha hai toh saari values ko thoda kam kar do; kam lag raha hai toh badha do. 3-4 बार adjust करने के बाद तुम्हें feel आ जाएगा कि कितनी value सही रहती है। Alight motion complete tutorial 2026 […]
[…] Alight Motion Text Animation क्यों Best है: […]