
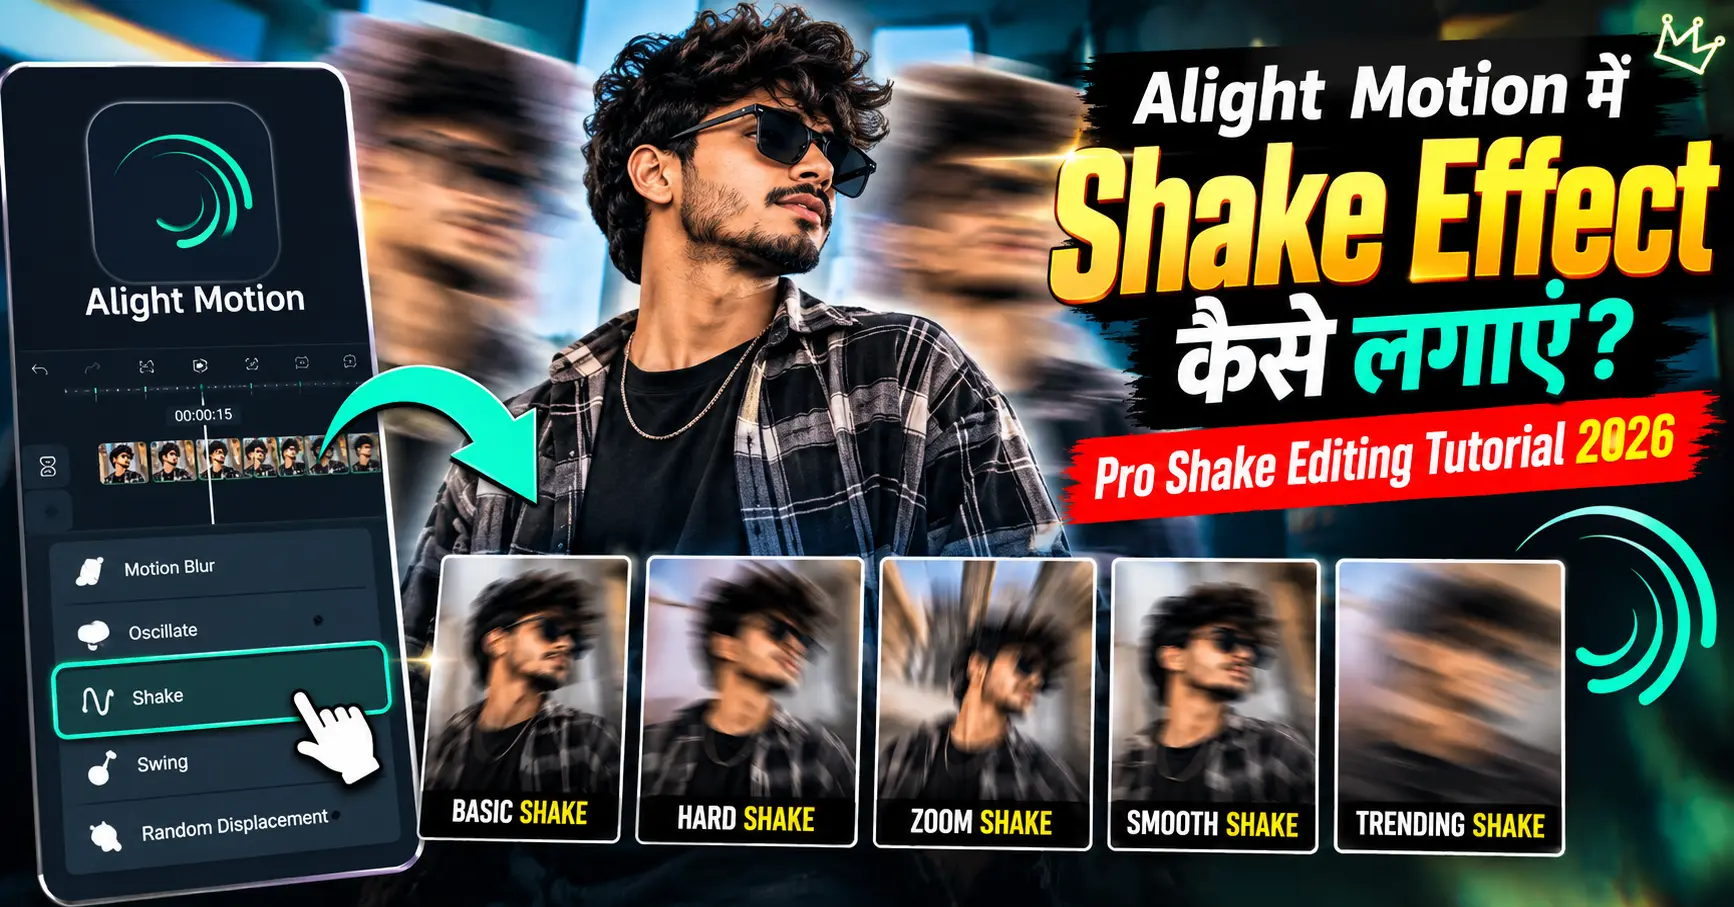
यार, एक सच बताता हूं जो ज़्यादातर लोगों को पता नहीं होता।
Reels या Shorts पर वो edits देखे हैं जहाँ beat drop होते ही पूरी screen हिल जाती है — जैसे कैमरा खुद झटका खा गया हो? वो एक second का shake पूरे edit का impact 10 गुना बढ़ा देता है। और सबसे मज़ेदार बात ये है कि वो कोई magic नहीं है — वो सिर्फ 4-5 keyframes का काम है।
लेकिन यहीं पर ज़्यादातर beginners गलती करते हैं।
वो या तो shake इतना heavy लगा देते हैं कि video देखने लायक नहीं रहती, या इतना हल्का कि पता ही नहीं चलता। और सबसे common problem — shake beat के साथ sync नहीं होता, जिससे पूरा effect बेकार लगने लगता है।
आज इस tutorial में मैं तुम्हें Alight Motion Shake Effect लगाने के 5 अलग-अलग तरीके बताऊंगा — manual keyframes से लेकर presets तक, साथ में exact values, beat syncing, aur pro-level tips.
Complete tutorial। चलो शुरू करते हैं।
Shake Effect Kya Hai?
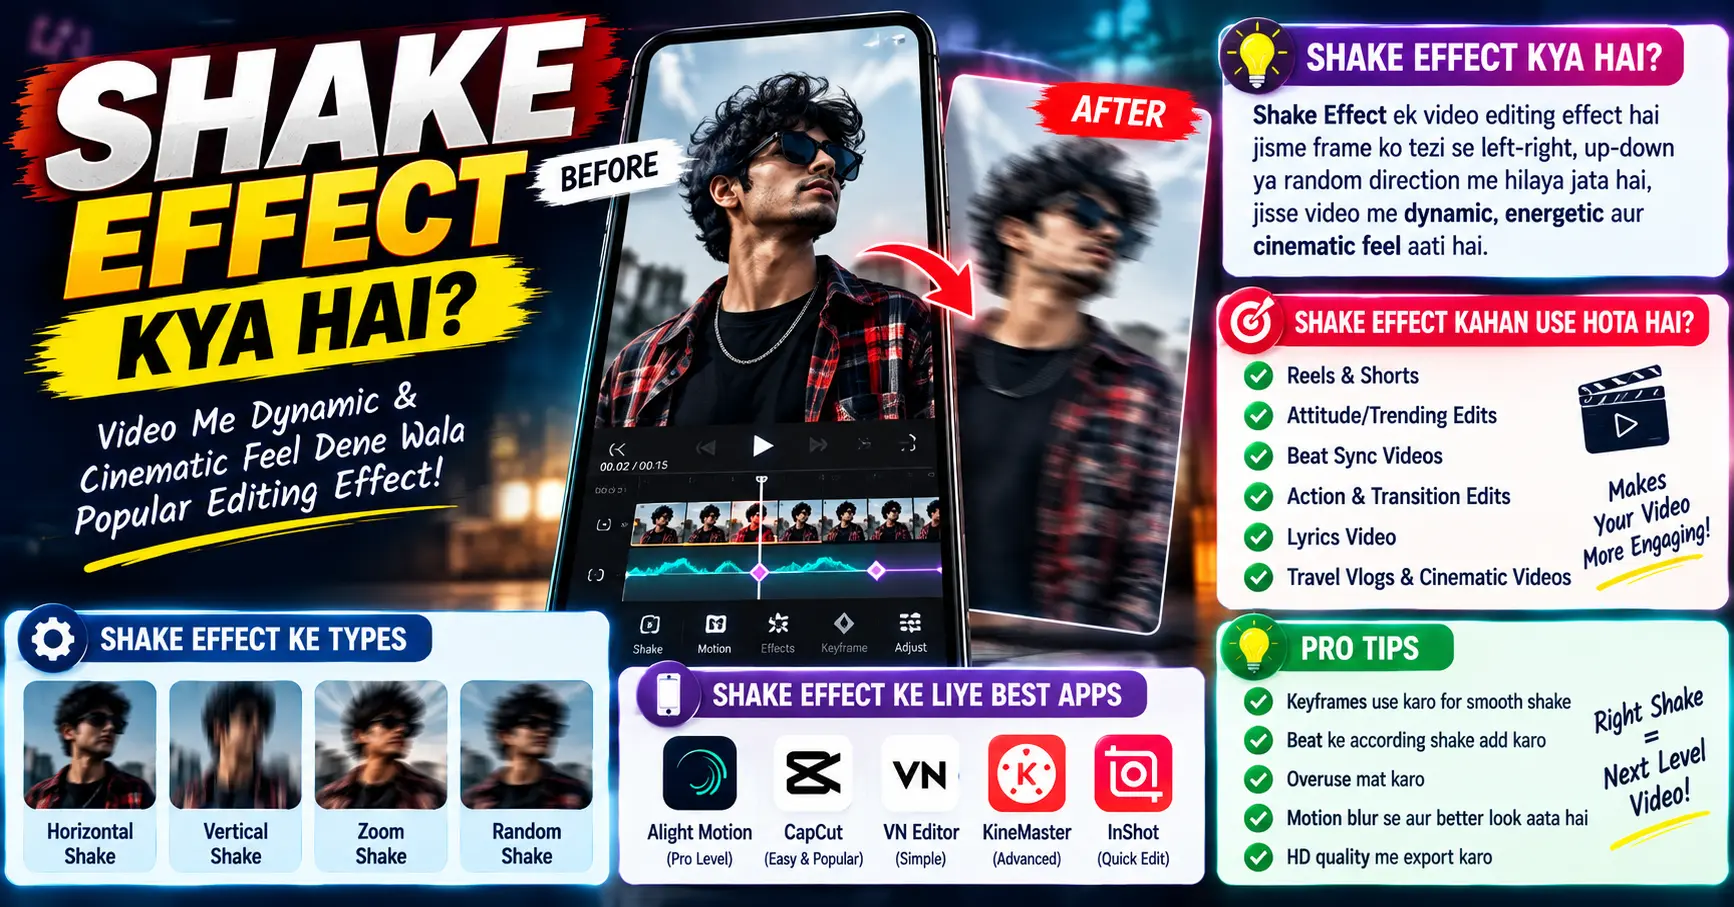
Shake Effect एक editing technique है जिसमें video को बहुत कम समय के लिए तेज़ी से हिलाया जाता है — ताकि ऐसा लगे जैसे कैमरे को झटका लगा हो या कोई impact हुआ हो।
Shake Effect = Video Ki Position/Rotation/Scale Ko
               Kuch Frames Ke Liye Rapidly Change Karna
               Aur Phir Wapas Original Par Le Aana
असल में क्या होता है: Shake कोई अलग “effect button” नहीं है — ये सिर्फ keyframes का pattern है। तुम video को 2-3 frames के लिए left-right-up-down हिलाते हो, और फिर वापस center पर ले आते हो। बस यही पूरा concept है।
कहाँ use होता है:
- Beat Drop Par (Music Edits, Velocity Edits)
- Impact Moments Par (Punch, Hit, Explosion)
- Transitions Ke Beech Mein
- Text Reveal Ke Saath
- Gaming Highlights Aur Sports Edits Mein
Shake Effect Kaise Kaam Karta Hai
इसके पीछे का logic समझना ज़रूरी है, वरना keyframes लगाना सिर्फ guesswork बन जाएगा।
Shake Ke 3 Building Blocks:

1. Position (X, Y) → Video Ko Left-Right-Up-Down Hilana
2. Rotation → Video Ko Thoda Tilt Karna
3. Scale → Video Ko Zoom In/Out Karna
Shake Ka Basic Pattern:
Frame 1: Original Position (0, 0)
Frame 2: Thoda Left-Up (-20, -15)
Frame 3: Thoda Right-Down (25, 18)
Frame 4: Thoda Left-Down (-15, 12)
Frame 5: Wapas Original (0, 0)
सबसे ज़रूरी बात — Randomness: Real shake कभी symmetrical नहीं होता। अगर तुम values को perfectly equal रखोगे (जैसे -20, +20, -20, +20), तो shake fake aur mechanical लगेगा। हर frame की value थोड़ी अलग रखो — यही shake को natural बनाता है।
Shake Ke Types
हर situation के लिए एक अलग तरह का shake काम करता है।
| Shake Type | Kya Karta Hai | Kahan Use Karein |
|---|---|---|
| Position Shake | Video left-right-up-down hilti hai | Sabse common, beat drops par |
| Rotation Shake | Video thoda tilt hoti hai | Intense moments, chaos feel |
| Scale/Zoom Shake | Video zoom in-out karti hai | Punch effect, impact moments |
| Combo Shake | Teeno ek saath | Heavy beat drops, climax moments |
| Wiggle/Continuous Shake | Poore clip mein halka sa shake | Handheld camera feel |
| Glitch Shake | Shake + RGB shift + distortion | Gaming, cyberpunk style edits |
Suggestion: शुरुआत हमेशा Position Shake से करो — ये सबसे simple है और 80% cases में यही काफी होता है। बाकी types बाद में experiment करना।
Requirements Aur Project Setup
Shake लगाने से पहले project सही तरीके से setup होना चाहिए।
Requirements:
- Alight Motion App (Free Version Bhi Chalega)
- Ek Achi Quality Clip (Minimum 1080p)
- Beat-Heavy Audio (Agar Music Edit Kar Rahe Ho)
Project Setup Steps:
Step 1: Alight Motion Open Karo → "+" Se New Project
Step 2: Aspect Ratio Choose Karo (9:16 Reels Ke Liye)
Step 3: Frame Rate 60 FPS Set Karo
Step 4: Project Create Karke Apni Clip Import Karo
Important — 60 FPS क्यों: Shake सिर्फ 3-5 frames का होता है। अगर project 30 FPS पर है, तो तुम्हारे पास shake बनाने के लिए बहुत कम frames होंगे और effect jerky लगेगा। 60 FPS पर shake बहुत ज़्यादा smooth aur professional लगता है।
एक और ज़रूरी tip: Shake लगाने से पहले video को थोड़ा zoom in कर लो (Scale 105-110%)। क्योंकि जब video हिलेगी, तो उसके किनारों पर black edges दिख सकते हैं। थोड़ा zoom करने से ये problem पूरी तरह solve हो जाती है।
Method 1: Position Keyframes Se Manual Shake
ये सबसे basic aur सबसे useful तरीका है — इसे सीख लिया तो बाकी सब आसान है।
Step 1: Timeline Mein Video Layer Par Tap Karo
Step 2: Scale Ko 110% Kar Do (Black Edges Se Bachne Ke Liye)
Step 3: Playhead Ko Wahan Le Jao Jahan Shake Chahiye (Beat Par)
Step 4: Position Property Kholo → Keyframe Add Karo (Value: 0, 0)
Step 5: Playhead Ko 1 Frame Aage Badhao
        → Position Change Karo (Jaise -18, -12)
Step 6: Phir 1 Frame Aage → Position (22, 15)
Step 7: Phir 1 Frame Aage → Position (-14, 20)
Step 8: Phir 1 Frame Aage → Position (10, -8)
Step 9: Last Frame Par Position Wapas (0, 0) Kar Do
Ho Gaya! Ab Preview Karo —
Beat Par Video Ek Second Ke Liye Zordar Hilegi
Aur Phir Normal Ho Jaayegi
Real Baat: पहली बार में values perfect नहीं लगेंगी — ये बिल्कुल normal है। Preview करो, aur agar shake zyada lag raha hai toh saari values ko thoda kam kar do; kam lag raha hai toh badha do. 3-4 बार adjust करने के बाद तुम्हें feel आ जाएगा कि कितनी value सही रहती है। Alight motion complete tutorial 2026
Method 2: Rotation Shake
Position के साथ rotation add करने से shake ज़्यादा realistic aur intense लगता है।
Step 1: Video Layer Select Karo → Rotation Property Kholo
Step 2: Shake Ke Pehle Frame Par Keyframe (Rotation: 0°)
Step 3: Agle Frame → Rotation: -2°
Step 4: Agle Frame → Rotation: 3°
Step 5: Agle Frame → Rotation: -1.5°
Step 6: Last Frame → Rotation: 0°
Rotation Values Ka Rule:
Halka Shake: 1° - 2°
Medium Shake: 2° - 4°
Heavy Shake: 4° - 7°
(Isse Zyada Rakhne Par Video Tilted Aur Weird Lagne Lagti Hai)
Pro Tip: Rotation shake हमेशा position shake के साथ लगाओ, अकेले नहीं। अकेला rotation shake थोड़ा अजीब लगता है, लेकिन position के साथ मिलकर बहुत natural feel देता है।
Method 3: Scale/Zoom Shake (Punch Effect)
ये shake का एक अलग flavour है — इसमें video हिलने की बजाय “punch” करती है।
Step 1: Video Layer → Scale Property Kholo
Step 2: Beat Se 1 Frame Pehle Keyframe (Scale: 110%)
Step 3: Exact Beat Par Keyframe (Scale: 125%)
Step 4: Agle 2 Frames Mein (Scale: 112%)
Step 5: Phir 2 Frames Baad Wapas (Scale: 110%)
Step 6: Easing Lagao — "Ease Out" Sabse Acha Lagta Hai
कब use करें: Scale shake तब सबसे अच्छा लगता है जब beat drop heavy हो — जैसे bass drop या किसी impact moment पर। Normal beats के लिए position shake ही बेहतर है।
Combo Trick: Position + Scale दोनों को same time पर लगाने से जो effect बनता है, वही ज़्यादातर professional edits में इस्तेमाल होता है — video हिलती भी है और punch भी करती है।
Method 4: Wiggle/Auto Shake (Built-In Effect)
अगर manual keyframes लगाने का time नहीं है, तो Alight Motion में built-in options भी हैं।
Step 1: Video Layer Select Karo
Step 2: "Effects" Mein Jao → "+" Se Effect Add Karo
Step 3: "Wiggle" Ya "Shake" Type Ka Effect Dhundo
Step 4: Uski Intensity Aur Frequency Adjust Karo
| Setting | Kya Karta Hai | Recommended |
|---|---|---|
| Amount/Intensity | Kitna zyada hilega | 10-30 (halke shake ke liye) |
| Frequency/Speed | Kitni tezi se hilega | 8-15 |
| Smoothness | Movement kitna smooth hoga | Medium |
Important — कब use करें: Wiggle effect continuous shake के लिए best है (जैसे पूरे clip में handheld camera feel देना)। लेकिन beat drop वाले sudden shake के लिए manual keyframes ही ज़्यादा control aur better result देते हैं।
Version Note: Alight Motion के अलग-अलग versions में effects के नाम थोड़े अलग हो सकते हैं। अगर exact “Wiggle” ना मिले, तो “Shake”, “Jitter”, या “Camera Shake” जैसे similar नाम ढूंढो।
Method 5: XML Preset Import Karna
Community presets से shake instantly लगाया जा सकता है — ये सबसे fast तरीका है।
Step 1: Koi Trusted Source Se Shake Preset Ki XML File Download Karo
Step 2: Alight Motion Open Karo → Project Mein Jao
Step 3: Layer Select Karo → "Import Preset" Ya "Paste Effect" Option
Step 4: XML File Select Karo Ya Link Paste Karo
Step 5: Preset Apply Ho Jaayega — Ab Intensity Apne Hisaab Se Adjust Karo
⚠️ Safety Note: XML presets सिर्फ trusted sources से ही download करो। Random websites से downloaded files में unwanted content हो सकता है, या वो तुम्हारे project को corrupt कर सकती हैं।
असली Advice: Presets शुरुआत के लिए ठीक हैं, लेकिन सिर्फ presets पर depend मत करो। Manual shake सीखने से तुम्हें full control मिलता है — और हर edit unique लगता है, जबकि presets से बने edits एक जैसे दिखने लगते हैं।
Beat Ke Saath Shake Sync Karna
यही वो चीज़ है जो amateur edit और professional edit में फर्क डालती है। तो देर किस बात की आप beat के बीच के shake effect से रिपीट को सिंक करना तो यहां पर मैंने कुछ स्टेप्स बताएं है जिन स्टेट का उसे करके मतलब के अपने वीडियो में ऐड करके आप जो beat है कि पेट को सिंक कर पाओगे
Sync Karne Ka Process:
Step 1: Pehle Audio Add Karo, Phir Shake Lagao (Ye Order Important Hai)
Step 2: Audio Ka Waveform Dekho — Badi Spike = Beat
Step 3: Playhead Ko Us Spike Par Exactly Le Jao
Step 4: Shake Ka Pehla Keyframe Wahin Se Shuru Karo
Step 5: Preview Karke Frame-By-Frame Verify Karo
Golden Rule: Shake का सबसे intense frame exact beat drop पर होना चाहिए — उससे एक frame पहले या बाद नहीं।
Common Timing Mistake:
❌ Shake Beat Ke Baad Shuru Hota Hai → Late Lagta Hai
❌ Shake Beat Se Pehle Khatam Ho Jaata Hai → Disconnect Lagta Hai
✅ Shake Exactly Beat Par Peak Karta Hai → Perfect Sync
Practical Tip: अगर sync में दिक्कत आ रही है, तो preview speed slow करके देखो या playhead को manually frame-by-frame slide करके check करो — इससे exact moment पकड़ना बहुत आसान हो जाता है।
Shake Ki Intensity Chart
यहाँ एक ready reference है — ये values direct use कर सकते हो। shake के इफेक्ट को बनाने के लिए
| Shake Level | Position Values | Rotation | Duration | Kahan Use Karein |
|---|---|---|---|---|
| Subtle | 5-12 px | 0.5° – 1° | 2-3 frames | Text reveal, halke beats |
| Medium | 15-25 px | 1° – 3° | 3-4 frames | Normal beat drops |
| Heavy | 30-45 px | 3° – 5° | 4-6 frames | Bass drops, impact moments |
| Extreme | 50-70 px | 5° – 8° | 5-8 frames | Climax, explosion effects |
Rule Of Thumb:
Chhoti Screen (Reels/Shorts) → Values Thodi Kam Rakho
Badi Screen (YouTube 16:9) → Values Thodi Zyada Chalti Hain
Important: ये values 1080×1920 (9:16) project के हिसाब से हैं। अगर तुम्हारा project resolution अलग है, तो values proportionally adjust करनी पड़ सकती हैं। shake effect
Motion Blur Add Karna
ये shake का सबसे underrated companion है — इसके बिना shake थोड़ा “sharp” aur artificial लगता है।
Step 1: Video Layer Select Karo → Effects Mein Jao
Step 2: "Motion Blur" Effect Add Karo
Step 3: Intensity Ko 20-40% Ke Beech Rakho
Step 4: Preview Karke Dekho — Shake Ab Kaafi Smooth Lagega
क्यों ज़रूरी है: जब कैमरा असल में हिलता है, तो motion blur naturally आता है। Digital shake में ये नहीं होता, इसलिए manually add करने से effect बहुत ज़्यादा realistic लगता है।
Tip: Motion blur बहुत ज़्यादा मत बढ़ाओ — 40% से ऊपर जाने पर video धुंधली लगने लगती है।
Shake + Velocity + Zoom — Combo Effect
Professional edits में shake अकेला नहीं आता, वो हमेशा दूसरे effects के साथ combine होता है।
Perfect Beat Drop Combo:
Same Beat Par Ye Teeno Ek Saath Lagao —

1. Velocity Snap (Time Remap Se Speed Sudden Fast)
2. Scale Punch (110% → 125% → 110%)
3. Position Shake (4-5 Frames Ka)

+ Bonus: Chromatic Aberration 2-3 Frames Ke Liye
Layer Order (Upar Se Neeche):
Effects Layer (Glow, Chromatic Aberration)
     ↓
Video Layer (Shake + Zoom Keyframes)
     ↓
Background/Audio Layer
Real Baat: शुरुआत में सारे effects एक साथ लगाने की कोशिश मत करो। पहले सिर्फ shake perfect करो, फिर zoom add करो, फिर velocity। एक-एक करके layer बनाने से result ज़्यादा clean आता है और debug करना भी आसान रहता है।
Export Settings
Edit कितना भी अच्छा हो, गलत export settings shake को choppy बना देती हैं।
| Setting | Recommended Value |
|---|---|
| Resolution | 1080p (ya 4K agar source 4K ho) |
| Frame Rate | 60 FPS (shake ke liye zaroori) |
| Format | MP4 |
| Bitrate | Highest Available |
| Quality | High/Maximum |
Export Se Pehle Checklist:
- Pura Preview Dekho, Har Shake Sync Hai Ya Nahi
- Black Edges Toh Nahi Dikh Rahe Kahin
- Audio Sync Verify Karo
- Koi Extra Layer Ya Watermark Toh Nahi Reh Gayi
Important: 60 FPS पर export ना करने से shake के frames कम हो जाते हैं और पूरा effect जल्दी-जल्दी, टूटा हुआ सा दिखता है — ये सबसे common export mistake है।
Pro Tips
Tip 1: Har Beat Par Shake Mat Lagao
       Sirf Major Beats Par — Warna Video Irritating Lagti Hai

Tip 2: Shake Ke Baad Ek "Rest Moment" Do
       Continuous Shake Se Viewer Ki Aankhein Thak Jaati Hain

Tip 3: Values Ko Kabhi Symmetrical Mat Rakho
       (-20, +20, -20) Fake Lagta Hai
       (-18, +24, -13) Natural Lagta Hai

Tip 4: Shake Ki Duration Short Rakho
       3-5 Frames Kaafi Hain — Lamba Shake Amateur Lagta Hai

Tip 5: Ek Baar Perfect Shake Ban Jaye To Use Save Karo
       Copy-Paste Karke Dusre Beats Par Reuse Kar Sakte Ho

Tip 6: Reference Edits Dekho
       Achhe Editors Ke Edits Ko Slow Karke Dekho
       Ki Unka Shake Kitna Lamba Aur Kitna Intense Hai
Common Mistakes
❌ Mistake 1: Shake Ke Waqt Black Edges Dikhna
✅ Fix: Shake lagane se pehle video ka Scale 105-110% kar do — isse video ke kinare frame ke bahar rehte hain aur black edges nahi dikhte।
❌ Mistake 2: Beat Ke Saath Sync Na Karna
✅ Fix: Pehle audio add karo, waveform ki spike dekho, aur shake ka peak exact beat par rakho — frame-by-frame verify karna zaroori hai।
❌ Mistake 3: Bahut Lamba Shake Banana
✅ Fix: Shake sirf 3-5 frames ka rakho — 1 second lamba shake professional nahi, amateur lagta hai।
❌ Mistake 4: Symmetrical Values Use Karna
✅ Fix: Har frame ki value thodi alag aur random rakho — perfectly equal values shake ko mechanical bana deti hain।
❌ Mistake 5: 30 FPS Project Banana
✅ Fix: Hamesha 60 FPS par project banao aur export karo — 30 FPS par shake ke liye frames hi kam pad jaate hain।
❌ Mistake 6: Motion Blur Skip Karna
✅ Fix: Shake ke saath halka Motion Blur (20-40%) zaroor lagao — isse effect natural aur cinematic lagta hai।
❌ Mistake 7: Har Jagah Shake Lagana
✅ Fix: Sirf major beat drops aur impact moments par shake lagao — kam shake wala clean edit hamesha zyada professional lagta hai।
Shake Effect Myths
| Myth | Sach |
|---|---|
| “Shake Effect ke liye Pro version zaroori hai” | ❌ Galat — manual keyframes se free version mein bhi perfect shake ban jaata hai |
| “Shake sirf presets se hi acha banta hai” | ❌ Galat — manual shake zyada control deta hai aur har edit unique lagta hai |
| “Zyada intense shake = better effect” | ❌ Galat — over-shake video ko unwatchable bana deta hai |
| “Shake ke liye expensive phone chahiye” | ❌ Galat — normal mid-range phone par bhi Alight Motion smoothly chalta hai |
| “Shake seekhne mein mahine lagte hain” | ❌ Galat — basic shake 1 din mein seekha jaa sakta hai, mastery practice se aati hai |
FAQs
1. Alight Motion Me Shake Effect Kaise Lagate Hain?
Video layer select करके Position property में 4-5 keyframes लगाओ, हर keyframe पर position थोड़ी अलग direction में change करो, aur last keyframe पर वापस original (0,0) कर दो — बस यही basic shake है।
2. Kya Shake Effect Free Version Mein Ho Sakta Hai?
हां, बिल्कुल। Position, Rotation aur Scale keyframes Alight Motion के free version में available हैं, इसलिए manual shake पूरी तरह free में बन सकता है। Free version में सिर्फ watermark आता है।
3. Shake Lagane Par Video Ke Kinare Kaale Kyun Dikhte Hain?
क्योंकि video हिलने पर उसका किनारा frame से बाहर चला जाता है और पीछे का खाली हिस्सा दिखने लगता है। इसे fix करने के लिए shake लगाने से पहले video का Scale 105-110% कर दो।
4. Shake Effect Kitne Frames Ka Hona Chahiye?
आमतौर पर 3-5 frames सबसे अच्छा रहता है। Heavy beat drops पर 6-8 frames तक जा सकते हो, लेकिन इससे ज़्यादा लंबा shake amateur लगने लगता है।
5. Shake Effect Beat Ke Saath Sync Kaise Kare?
पहले audio add करो, उसका waveform देखो — जहाँ बड़ी spike है वहीं beat है। Shake का peak frame exactly उसी point पर रखो, aur phir frame-by-frame preview करके verify करो।
Conclusion
यार, Alight Motion Shake Effect सीखना उतना मुश्किल नहीं है जितना पहली बार देखने पर लगता है। पूरा concept सिर्फ तीन चीज़ों पर टिका है — Position keyframes, random values, aur beat timing। बाकी सब (rotation, scale, motion blur) तो सिर्फ उसे polish करते हैं।
Key Takeaways:
✅ Shake koi alag button nahi — ye sirf keyframes ka pattern hai
✅ Hamesha Scale 105-110% karo, black edges se bachne ke liye
✅ Values kabhi symmetrical mat rakho — randomness hi natural banati hai
✅ Shake sirf 3-5 frames ka rakho, lamba shake amateur lagta hai
✅ 60 FPS par project banao aur export karo
✅ Motion Blur (20-40%) shake ko realistic banata hai
✅ Sirf major beats par shake lagao, har jagah nahi
पहला step — आज ही एक 5 second की clip लो, Scale 110% karo, aur sirf Position keyframes se ek simple shake banao. Rotation aur zoom baad mein add karna — pehle basic shake perfect karo.
कोई सवाल है? Comment में पूछो — जवाब ज़रूर मिलेगा।